
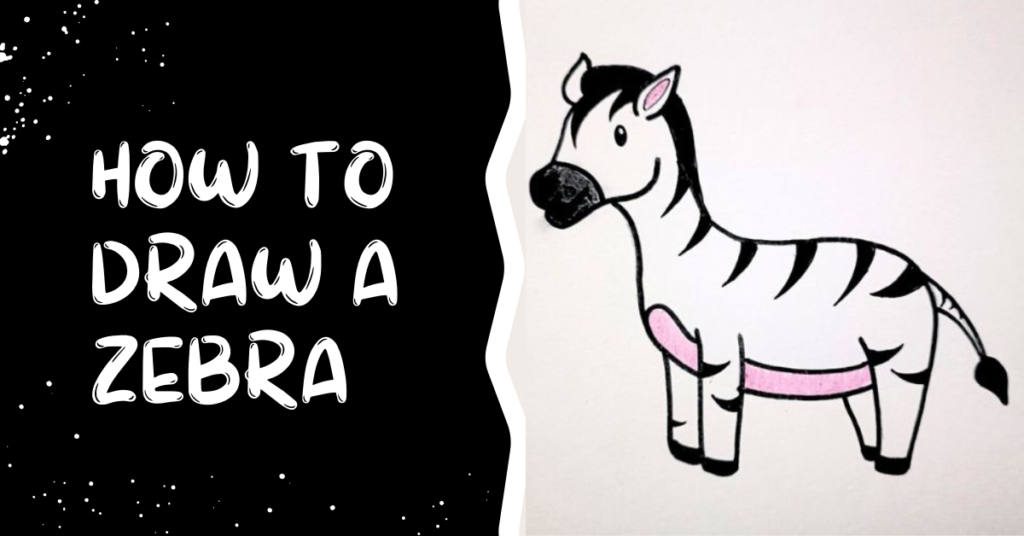
Welcome readers to a fun and friendly guide on how to draw a zebra! Drawing is a wonderful way to express your creativity and bring animals to life on paper. In this step-by-step guide, we will walk you through the process of drawing a zebra, from sketching the basic shapes to adding intricate details. So grab your paper and pencil, and let’s dive into the artistic journey of drawing a zebra!
Materials Required:
Before we begin, let’s gather all the materials you’ll need for this drawing tutorial. You will need:
- Paper or sketchbook: A blank sheet of paper or a sketchbook will serve as your canvas.
- Pencil and eraser: A pencil will allow you to create light and adjustable lines, while an eraser will help you correct any mistakes along the way.
- Black marker or pen: Once you’re satisfied with your pencil sketches, a black marker or pen will be used to outline and finalize your zebra drawing.
- Colored pencils or markers (optional): If you wish to add color to your zebra drawing, colored pencils or markers will bring it to life. However, coloring is optional, and you can keep your drawing in black and white if you prefer.
Step-by-Step Drawing Guide:
Let’s follow the steps given below to draw a Zebra.
Step 1:
Sketching the Basic Shapes

To begin, lightly draw two medium-sized ovals. The first oval will represent the head of the zebra, while the second oval will serve as the end of the body. Make sure these ovals are not too large or too small, as they will serve as the foundation for your zebra drawing. Below the body oval, add a smaller oval for the hindquarters of the zebra.
Step 2:
Outlining the Body

Using guidelines, sketch an elongated neck connected to the head oval. Next, draw two gently curved lines to represent the back and belly, connecting both oval shapes. These lines will define the body of your zebra.
Step 3:
Adding Legs and Hooves

Extend four straight lines down from the bottom of the belly to represent the legs of the zebra. Make sure the length of each leg is proportionate to the body. At the end of each leg, draw small rectangular shapes to indicate the hooves. These details will add realism to your zebra drawing.
Step 4:
Detailing Facial Features and Tail

Inside the head oval, add two small circles for the eyes. Draw a rounded triangle shape below the eyes to represent the nose/muzzle area. To complete the facial features, add a small circle inside the triangle shape to indicate the nostril of the zebra. Add hair on the head and back of the zebra. Finally, draw a tail in the shape you like.
Step 5:
Creating Stripes
Now comes the fun part – creating the unique stripes of the zebra! Carefully draw curved lines across the entire body of your zebra, mimicking its natural stripe pattern. Remember to follow along with the initial sketch of the body. These stripes will give your zebra its characteristic appearance.

Step 6:
Refining Details

Once you have finished sketching the stripes, take a moment to step back and assess your drawing. Erase any unnecessary guidelines or stray pencil marks. This will ensure that only your final outlines remain visible. Take your time with this step to achieve a clean and polished look for your zebra drawing.
Optional Step 7:
Coloring Your Zebra

If you wish to add color to your zebra, follow these steps. First, use a black marker or pen to trace over your pencil outlines once they’re dry. This will make your lines bold and crisp. Once the ink is dry, you can start coloring your zebra. Use shades of gray for its body and black for the stripes. Coloring the zebra in grayscale will give it a realistic appearance. If you want to add more creativity and personality to your drawing, feel free to use colored pencils or markers for additional touches.
Congratulations on completing your zebra drawing! Drawing animals can be a challenging yet rewarding experience, and you should be proud of your artistic accomplishment. Remember, practice makes perfect, so don’t hesitate to experiment with different poses, backgrounds, and artistic styles using this foundation. Drawing is a journey of self-expression and creativity, and there is no limit to what you can achieve with practice. Best of luck on your future artistic endeavors, and may your love for drawing continue to grow!

