
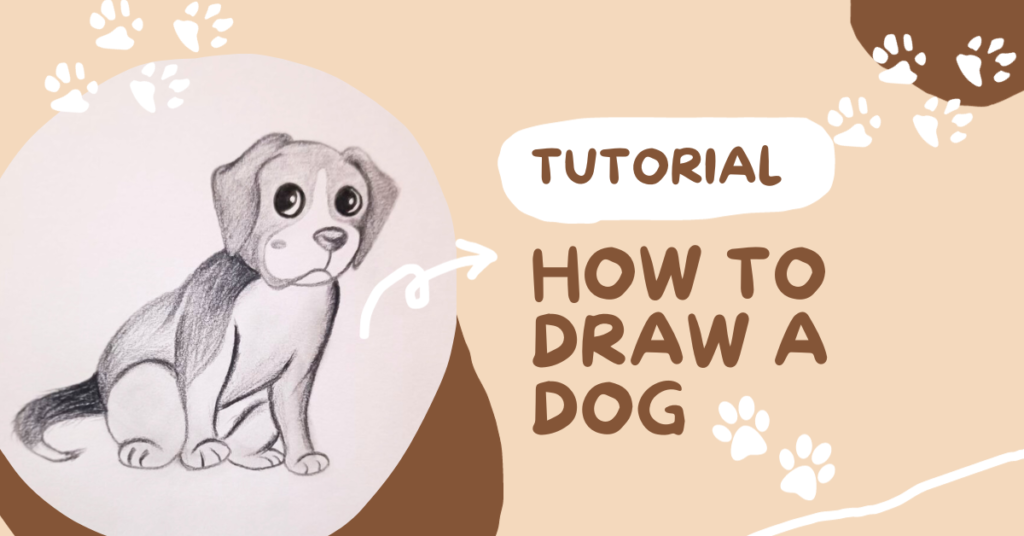
Are you a dog lover who has always wanted to capture the adorable essence of man’s best friend on paper? Well, look no further because in this blog post, we will guide you through the step-by-step process how to draw a dog! Whether you’re an experienced artist or just starting out, our easy-to-follow instructions and helpful tips will have you creating lifelike drawings of dogs in no time. So dust off your pencils and get ready to unleash your creativity as we dive into the wonderful world of drawing dogs!
Materials needed for How To draw a dog
When it comes to how to draw a dog, having the right materials can make all the difference. Here are some essential items you’ll need to bring your furry friend to life on paper.
First and foremost, you’ll need a sketchbook or paper to draw on. Choose one that is durable and suitable for the type of medium you plan to use. If you prefer traditional pencil drawings, opt for thicker paper that can handle erasing and shading without tearing easily.
Next, gather a selection of pencils in various hardness levels. A range from HB (medium) to 6B (soft) should be sufficient for most dog drawings. The softer pencils will allow you to create darker lines and shading, while harder ones are great for lighter details.
Don’t forget about erasers! A kneaded eraser is ideal for lifting graphite marks gently without leaving residue behind. You may also want a regular eraser for larger areas or precise corrections.
Have some reference photos of dogs handy as inspiration. These can help guide your proportions and capture the unique characteristics of different breeds. But here you got your step by step reference images…
With these materials at hand, you’re ready to embark on your artistic journey of drawing dogs with confidence! So grab your sketchbook, sharpen those pencils, and let your creativity flow!
Step-by-step guide on drawing a dog
Drawing a dog can be a fun and rewarding experience, whether you’re an aspiring artist or just looking for a new hobby. With some basic materials and the right technique, you’ll be able to create your own adorable canine masterpiece!
To start, gather your materials: paper, pencils (preferably different grades), and an eraser.
Begin by sketching the basic shape of the body and head using light pencil strokes. Start with simple shapes like circles or ovals to establish overall proportions. Remember that every dog has its own individual characteristics, so don’t worry about perfection at this stage.
Next, add details to the face and body. Pay attention to elements like snouts, ears, eyes, and mouths as these define the breed’s appearance. Use light lines initially; they can always be adjusted later on.
Moving on to the legs and paws is where many beginners struggle. Take your time here and carefully observe how each leg connects to the body. Dogs have four legs with joint areas that bend at specific angles.
It’s time to add fur texture and shading! This step brings life into your drawing by creating depth and realism. Observe reference images closely – notice how shadows fall across their bodies? Use short pencil strokes or cross-hatching techniques for shading effects.
 Remember that practice makes perfect when it comes to drawing dogs (or anything else!). Don’t get discouraged if your first attempts aren’t exactly what you envisioned – keep practicing regularly! Over time,you’ll develop your styleand improveyour skills.
Step 1:
Sketching the basic shape of the body and head
When it comes to drawing a dog, getting the basic shape of the body and head right is essential. This forms the foundation for creating a realistic and accurate representation of our furry friends.
To start, you’ll need a pencil and paper or any other medium you prefer for sketching. Begin by lightly sketching an oval shape for the head and an elongated oval or rectangle shape for the body. Remember, at this stage, we’re just looking to establish proportions, so don’t worry too much about details.
 Next, it’s time to add some more specific features to your dog’s head. Pay attention to the breed characteristics you want to depict – long snout or short snout? Floppy ears or pointy ears? Take your time in capturing these unique traits that will bring your drawing to life.
Moving on to the body, consider how large or small you want your dog to be. Sketch in some guidelines for where the legs should go – think about their placement in relation to the body as well as how they contribute to overall balance.

Once you have established these foundational shapes and proportions, take a step back and assess if everything looks balanced and proportional. Make any necessary adjustments before moving onto adding more detailed features like eyes, nose, mouth, tail etc., which we’ll cover in our next section!
Remember that practice makes perfect when it comes to drawing dogs (or anything else!). Don’t get discouraged if your first attempt doesn’t turn out exactly as planned – keep refining your skills by practicing regularly! So grab those pencils again because there’s more fun ahead!
Step 2:
Adding details to the face and body
Adding details to the face and body of your dog drawing is where you can really bring your artwork to life. This step allows for personalization and adds character to your creation.
Start by focusing on the facial features. Use gentle strokes to outline the eyes, ears, nose, and mouth. Remember that dogs come in different shapes and sizes, so take inspiration from the breed you are drawing.
Next, move on to adding fur texture. Dogs have a variety of coat types such as short hair, long hair, curly fur, or even spots. Capture these unique characteristics by using light lines or small dots to mimic their texture.
Don’t forget about adding some expression! Dogs communicate through their facial expressions just like humans do. Consider whether you want your dog to look happy, sad, or mischievous – this will add depth and emotion to your drawing.

Shading can enhance the three-dimensional effect of your drawing and make it more realistic. Later, use light strokes with a pencil or charcoal in areas that would naturally be darker such as under the chin or behind the ears.
Remember that practice makes perfect! Don’t be discouraged if your first attempts aren’t exactly what you envisioned – keep practicing and experimenting until you achieve a result that brings joy both to yourself and others who see it!
Step 3:
Drawing the paws
When it comes to drawing a dog, paying attention to the legs and paws is crucial for capturing their unique characteristics. Here’s how you can approach this step:
Dogs have four legs, so make sure they are proportionate and positioned correctly in relation to the body. Once you have the general shape, add more details. Remember that different dog breeds have different leg structures, so observe reference images or real dogs if possible.

Move on to drawing the paws. Begin with simple oval shapes for each paw pad and then add smaller ovals or circles for toes/claws.
Don’t forget about adding depth and dimension! Use shading techniques to create shadows around joints or under overlapping parts of the legs/paws.
Remember, practice makes perfect when it comes to drawing dogs’ legs and paws! Take your time, be patient, and keep refining your technique until you’re satisfied with your representation of man’s best friend.
Step 4: Final- How to Draw a Dog
Adding fur texture and shading
Adding fur texture and shading is essential to bringing your dog drawing to life. This step adds depth and dimensionality, giving your furry friend a realistic appearance.

Start by observing the direction in which the fur naturally grows on a dog. Typically, it follows the contours of the body. Use short, quick strokes with your pencil or pen to mimic this texture. Vary the length and direction of your strokes to create a more dynamic look.
To add shading, identify areas that would be in shadow based on the light source you’ve chosen for your drawing. Darken those areas slightly using hatching or cross-hatching techniques. Be mindful of where highlights would fall as well, leaving those areas lighter or even completely white.

Remember, that each breed has its own unique fur characteristics, so take some time to study references specifically related to the type of dog you’re drawing. This will help you capture their individuality and make your artwork more accurate.
So grab your pencils or pens and start experimenting with different ways to represent fur texture and shading in your dog drawings! The results will be worth it as you watch your canine creations come alive on paper.

